Home
1. Courier Welcome
When opening the application, a welcome message appears displaying the courier’s name registered in the system, confirming that they are logged in with the correct account.
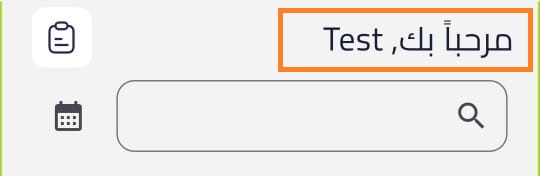
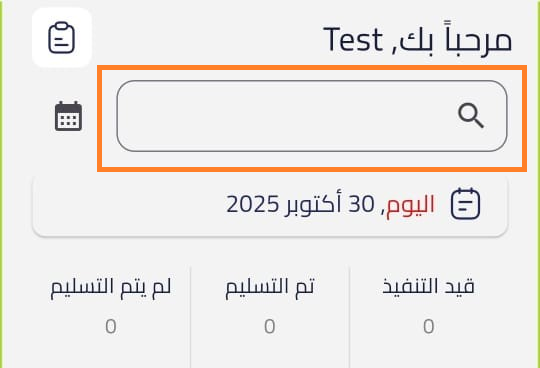
2. Search Bar
A search bar appears at the top of the page, allowing the courier to enter a shipment number to search for it directly within the app.
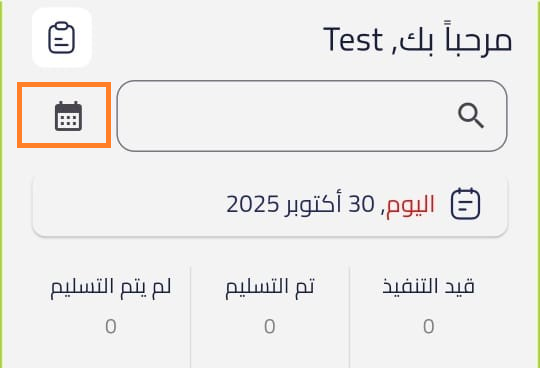
3. Date Filter
A button next to the search bar allows selecting a date.
Through it, the courier can search for shipments within a specific date, whether past or recent.
🆕 Courier Statistics
The Courier Statistics screen provides a detailed dashboard that helps the courier track their performance over a selected time period.
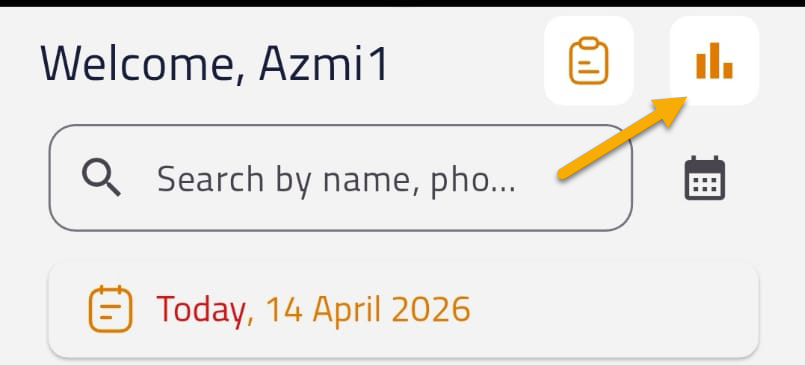
How to Use:
-
Select the time range (From – To).
-
The system will display statistics such as:
- Total number of shipments
- Completed shipments
- Not delivered shipments
- Other performance indicators
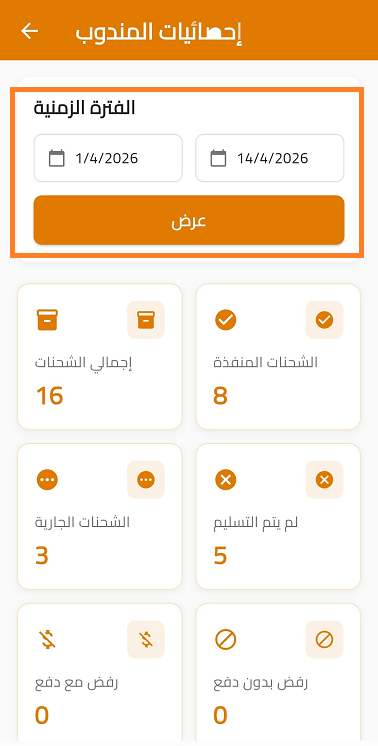
This screen helps the courier monitor and analyze their performance over any selected period.
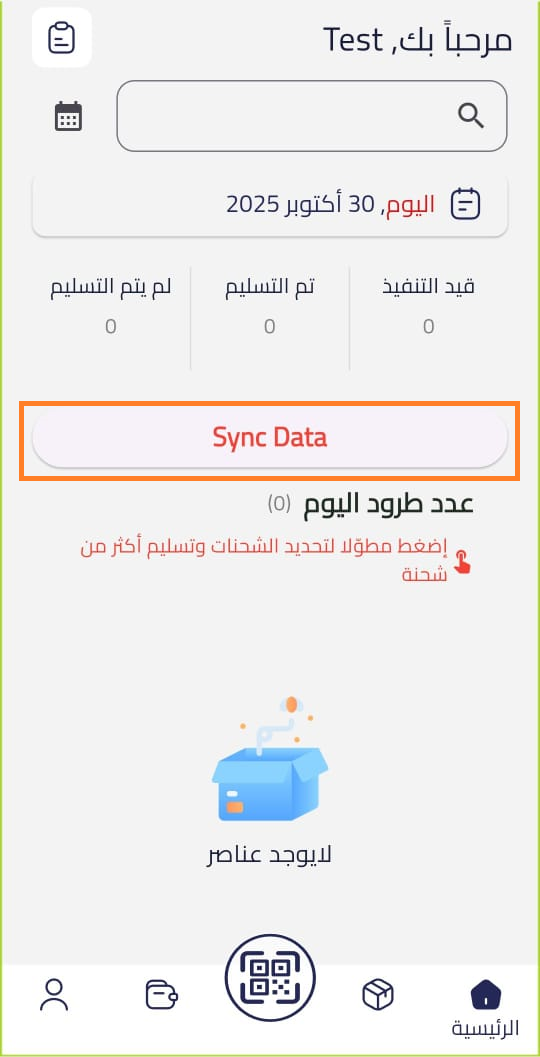
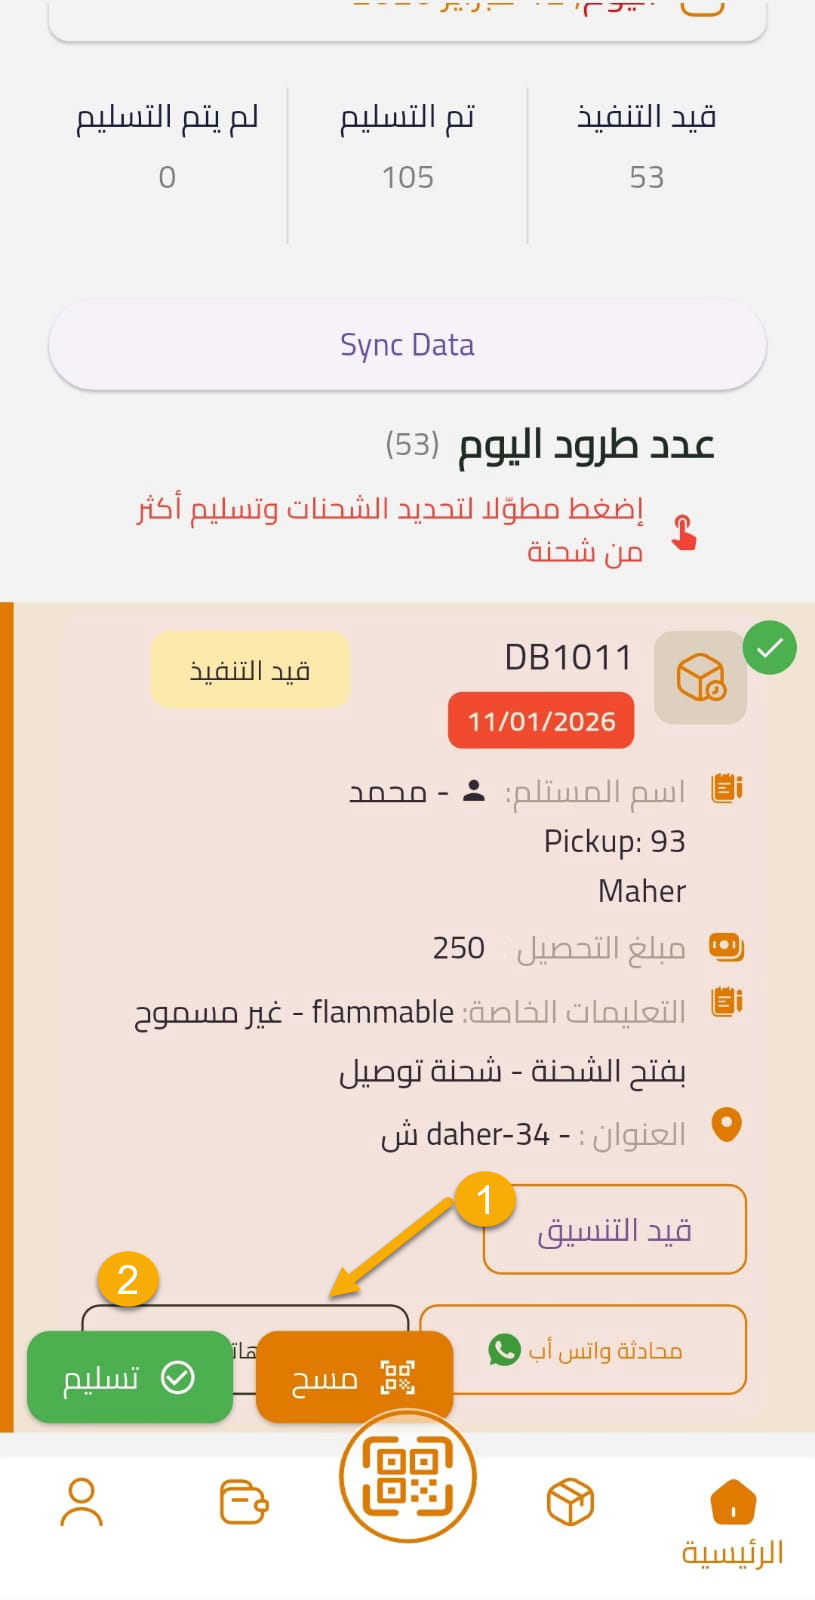
4. Dashboard
A dashboard appears showing daily statistics, including:
- In-progress shipments
- Delivered shipments
- Not delivered shipments
This helps the courier track performance and shipment status distribution.

5. Sync Data Button
Clicking the Sync Data button downloads new shipments assigned to the courier by the operations team. After syncing, all assigned shipments appear on the same page.
6. Shipment List & Action Buttons
Each shipment includes three main buttons:
A. “Coordinated” Button
- Indicates that the courier has contacted the customer and scheduled a delivery time.
- Helps operations track coordination status.
B. WhatsApp Button
- Opens WhatsApp to send a message to the customer.
- The message is a predefined template configured in “SMS Templates” in Dispatch Settings.
- Prevents sending random or inconsistent messages.
C. Call Button
- Allows the courier to call the customer directly.
- Helps operations verify communication with the customer.

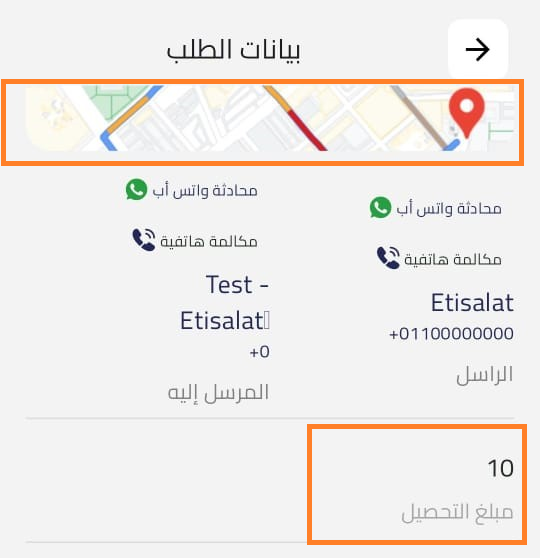
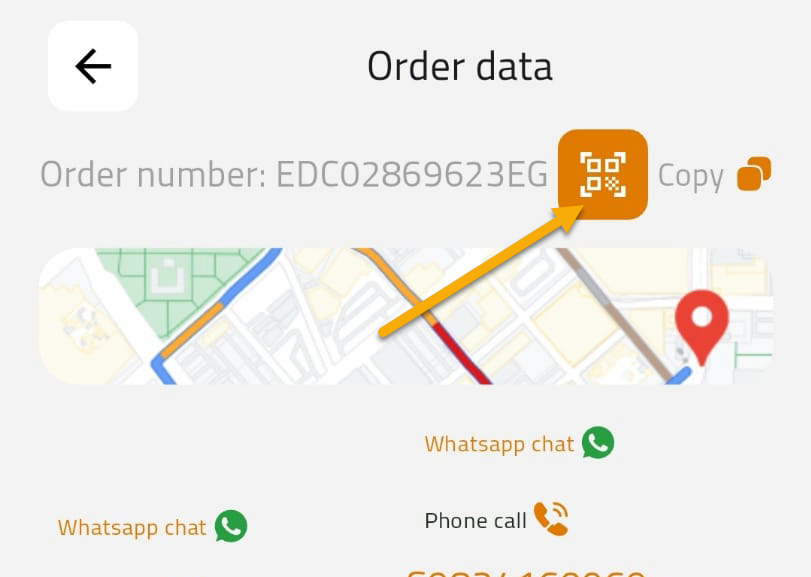
7. Shipment Details
When clicking a shipment, the shipment details page opens, including:
-
Map: Opens the customer’s location for delivery navigation.
-
COD Amount: Displays the amount to be collected from the customer.
-
Proof of Delivery (POD):
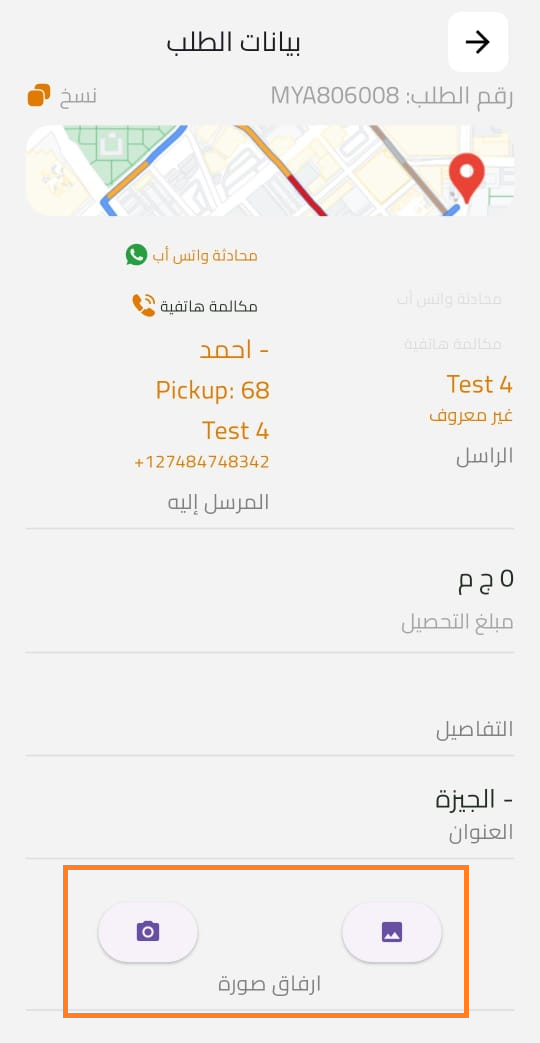
- If POD is mandatory, the courier must upload or capture an image first.
- This step cannot be skipped.
- Once completed, the courier can proceed.
-
The courier then selects the shipment status:
- Delivered
- Not Delivered
-
Shipment History: Displays all previous statuses and timestamps.
-
Deliver Button:
-
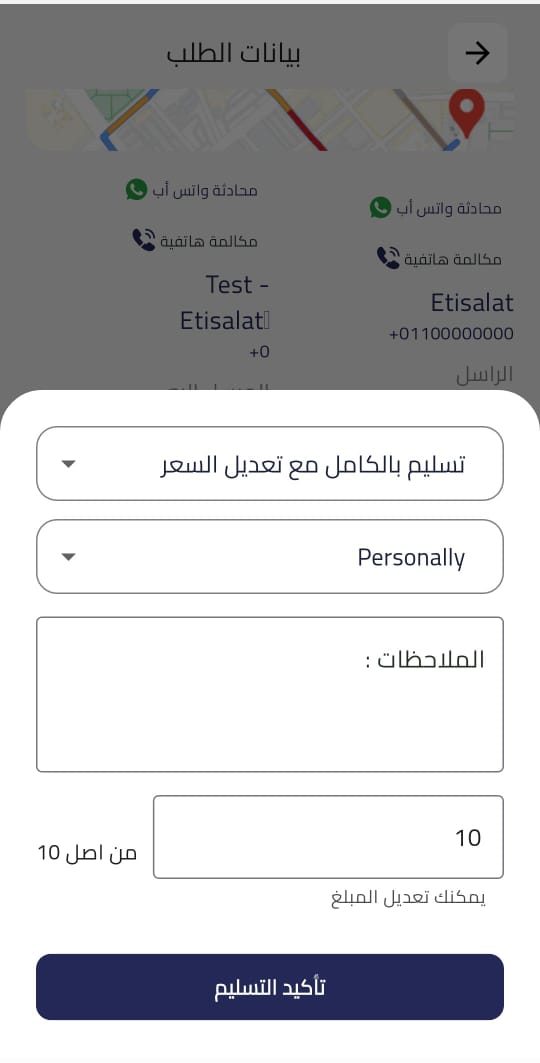
The courier selects delivery type:
- Full Delivery
- Partial Delivery
- Delivery with Price Adjustment
-
Selects the receiver (customer or relative).
-
Receiver categories can be configured from Settings → Receiver Categories.
-
Optional notes can be added.
-
If price is adjusted, a new amount must be entered before confirmation.
-
After confirmation, the shipment status is updated in Dispatch System Tracking.
-
-
Not Delivered Button:
-
The courier must provide:
- Reason (wrong address, no answer, refused, etc.)
- Additional notes
- If “Refused with shipping cost,” enter COD amount
-
Then click Confirm Not Delivered.
-

8. Bulk Actions
By long-pressing multiple shipments, the courier can mark multiple shipments as “Delivered” at once.
Additionally, shipments can be delivered in bulk using the Scan feature:
- Long press → choose Scan
- Scan shipments one by one
- Selected shipments show a checkmark (✓)
- Confirm to mark all as delivered
This feature speeds up delivery operations in the same location.
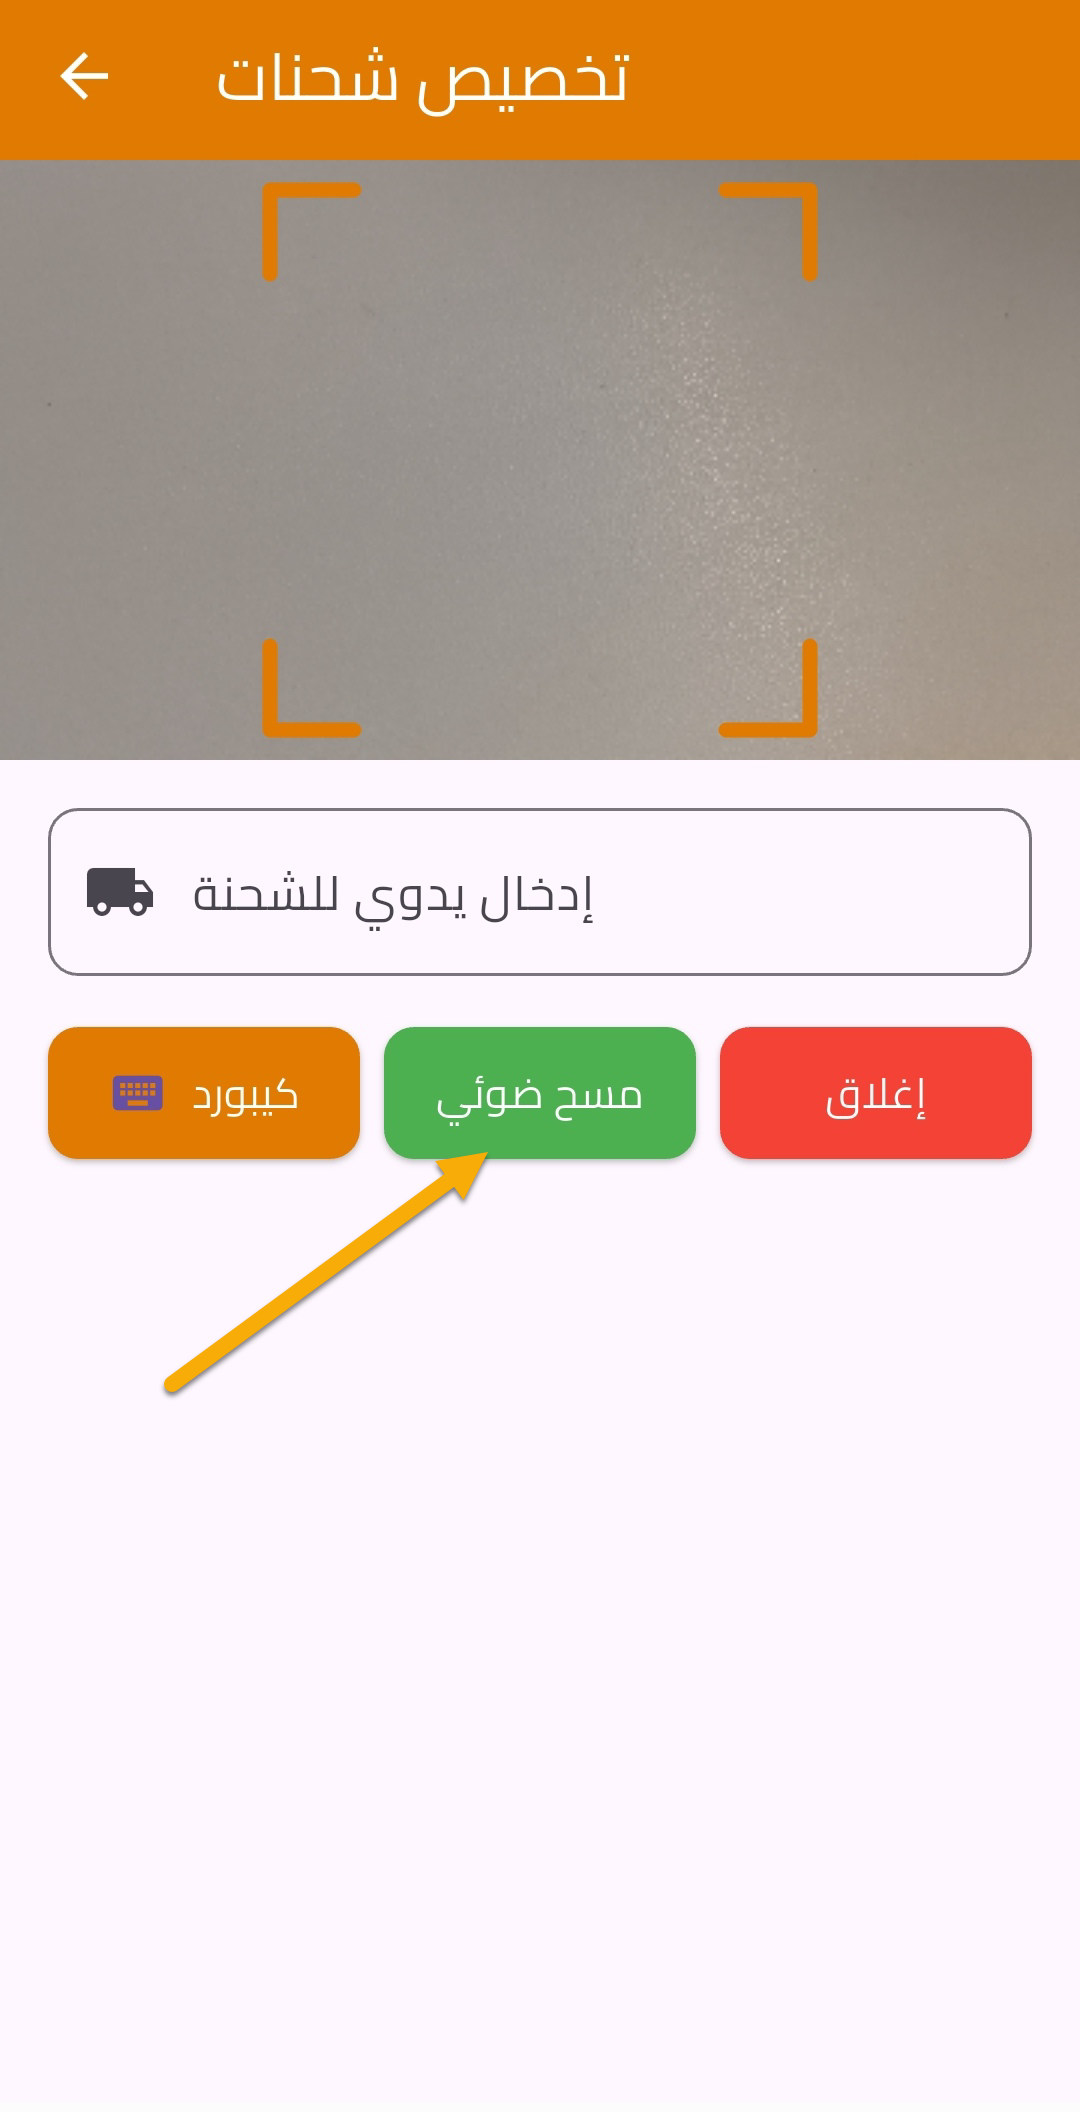
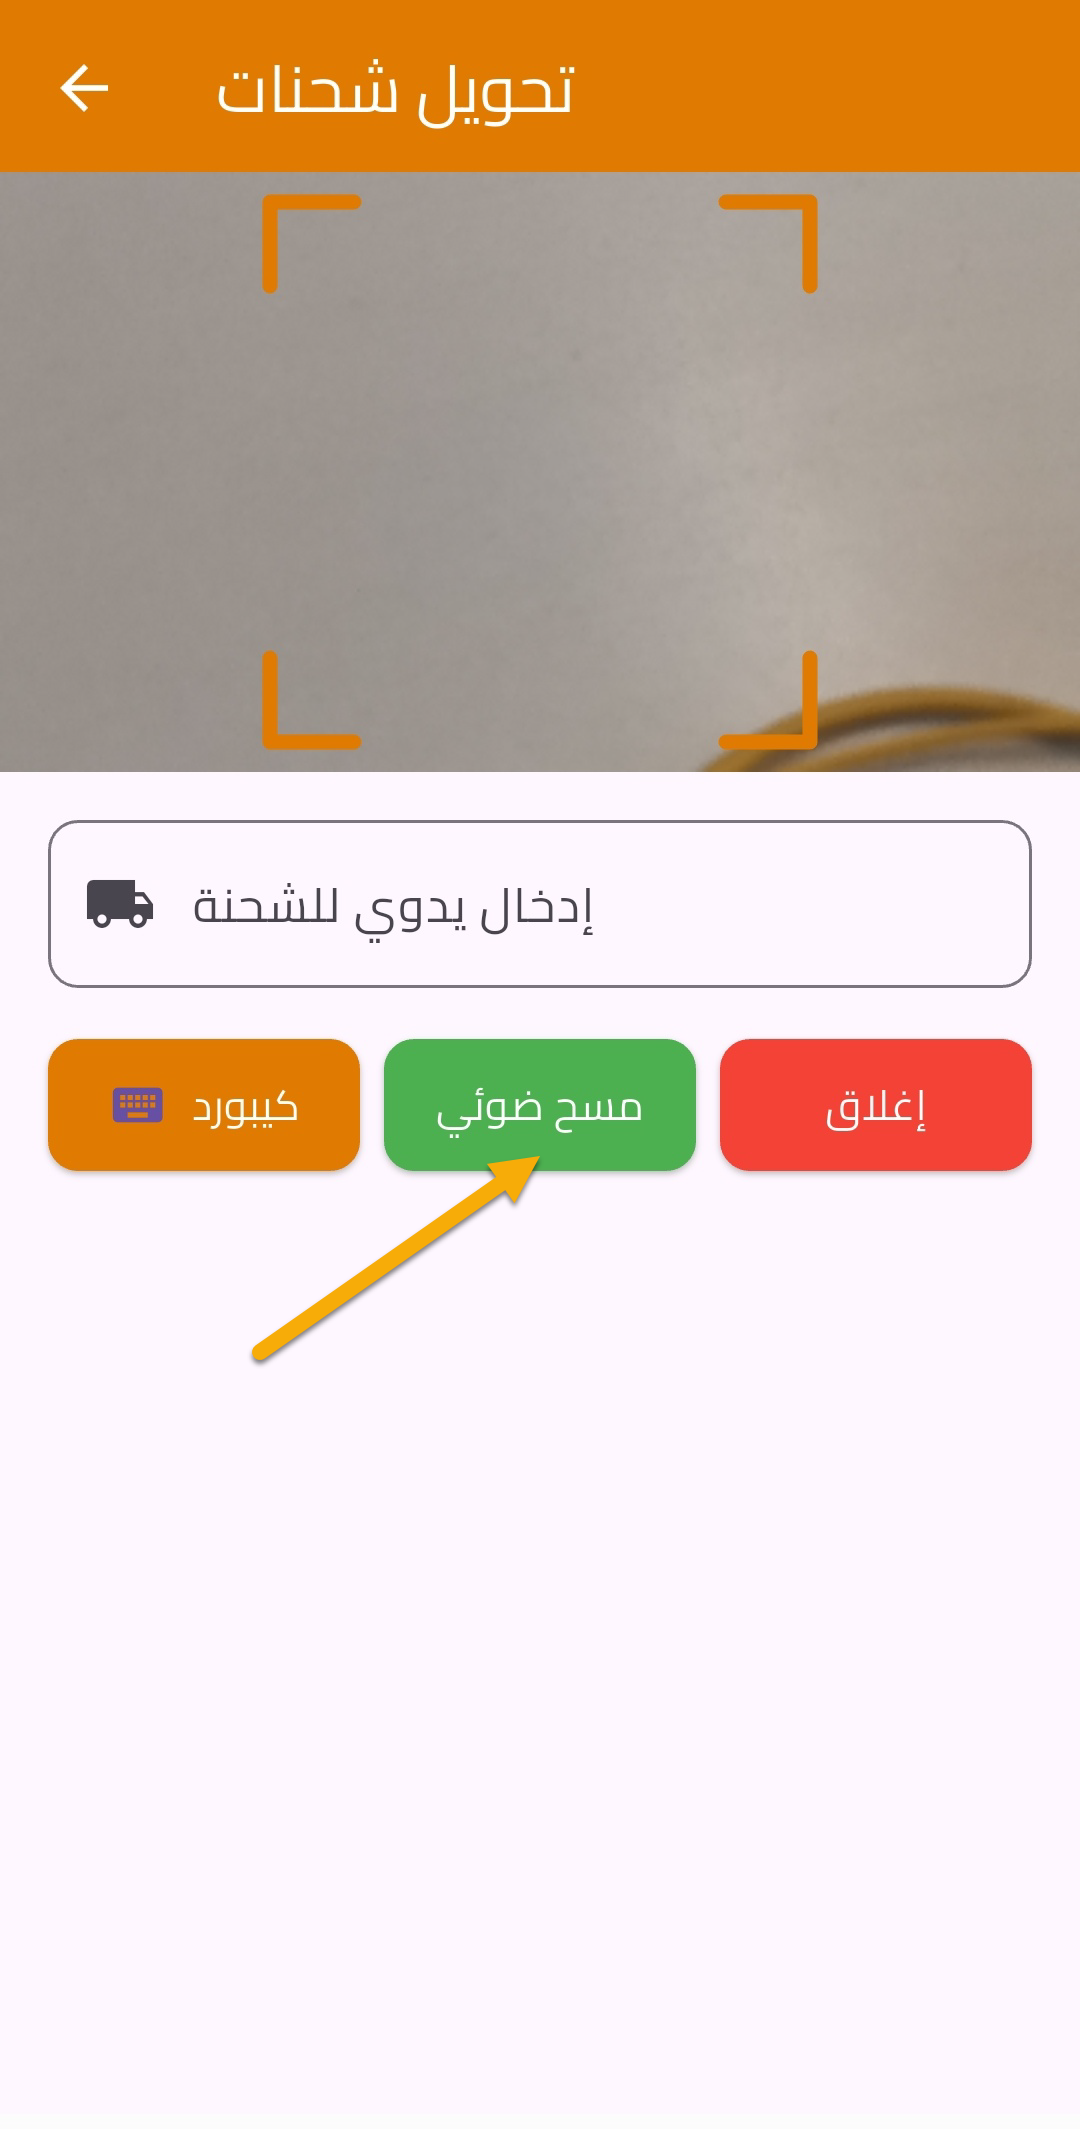
🆕 Assign Shipments
Allows the courier to assign shipments to themselves without operations involvement.
How to Use:
- Open the screen.
- Click the Camera button.
- Scan shipment QR Codes.
- Click Confirm.
- Click Post to finalize.
🆕 Confirm DRS Assignment
After shipments (DRS) are assigned, the courier must confirm receipt.
How to Use:
- Go to My Account.
- Select Confirm DRS Assignment.
- Scan shipment QR Codes.
- Click Confirm.
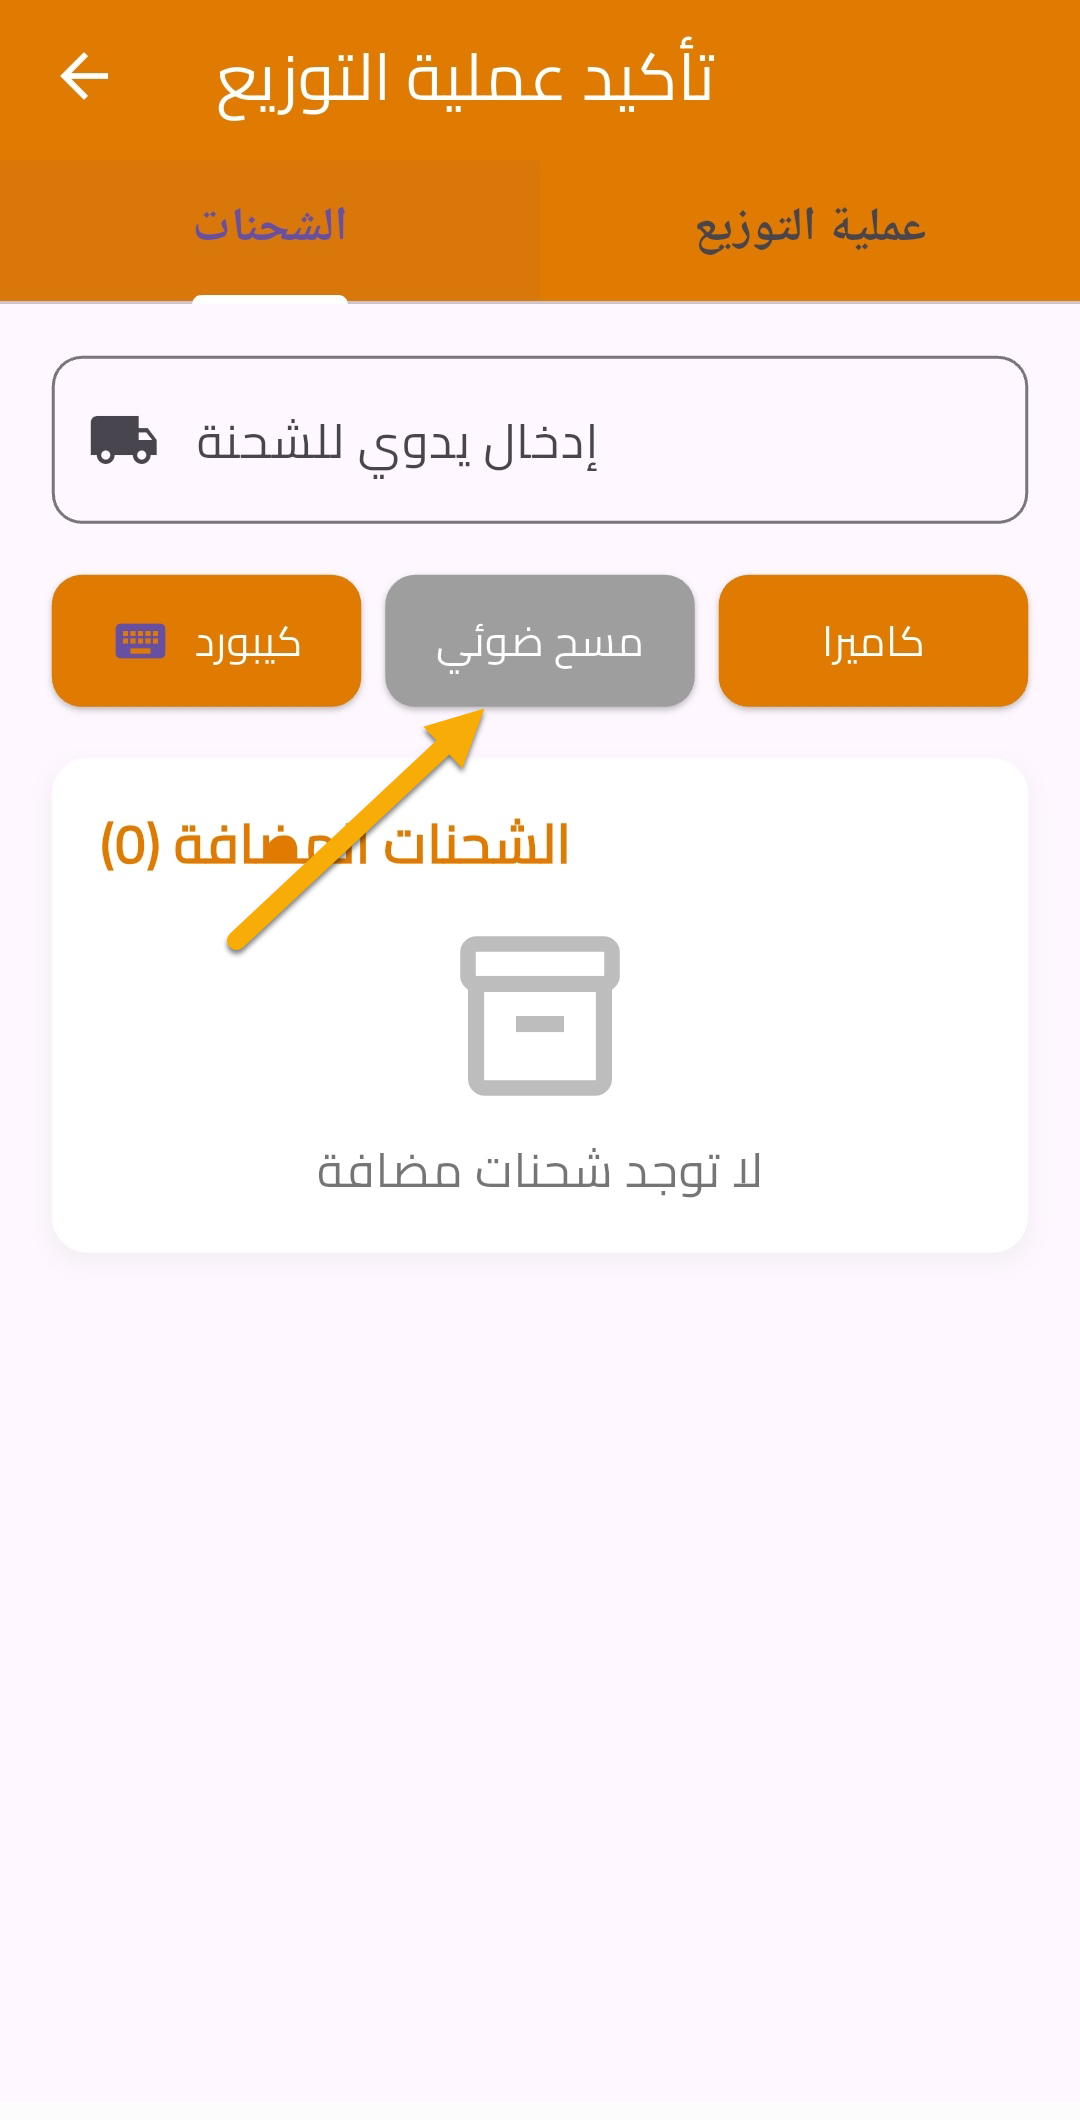
Shipments will then be available for delivery.
🆕 Transfer Shipments
Allows transferring shipments between couriers.
How to Use:
- Open Transfer Shipments.
- Scan shipments from another courier.
- Click Confirm.
Shipments will be instantly assigned to the new courier.
9. Note Button
At the top of the page, clicking Note redirects the courier to the Tasks page.
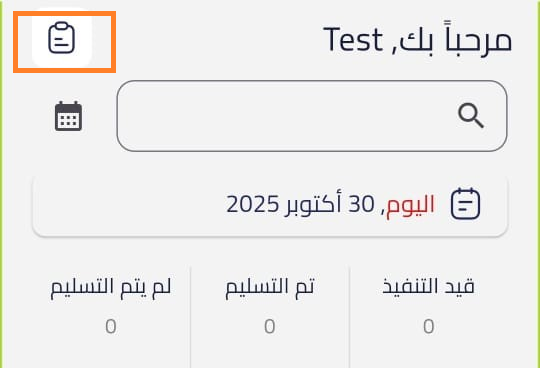
10. Tasks Page
Includes:
-
New Tasks (Pickups)
- Click ➕ to open the pickup scanning screen.
- Scan shipment barcodes using the mobile device.
- The system shows the number of scanned shipments.
- Click Confirm after finishing.
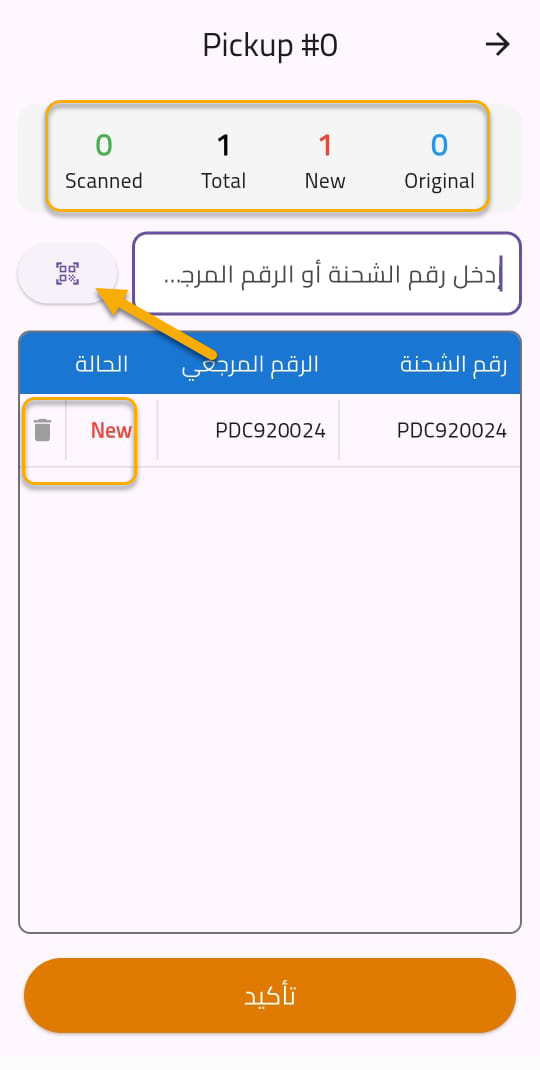
-
The task moves to Completed Tasks.
-
Status changes from Pick Up → Picked Up.
-
Shipments can be deleted before confirmation only.
-
If a pickup is assigned:
-
Open the pickup task
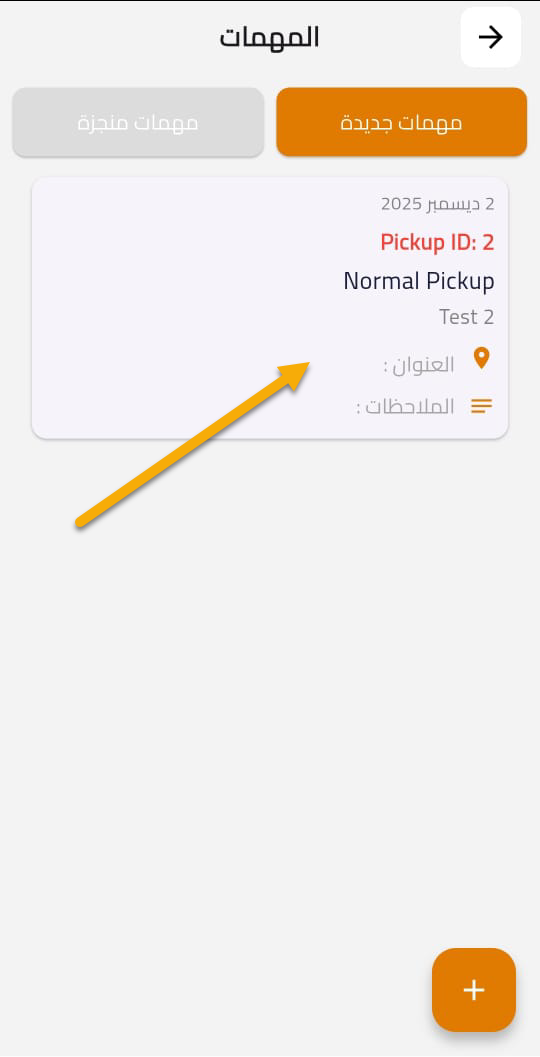
-
Choose status:
- Received
- Cancelled
-
If received, enter the number of collected orders
-
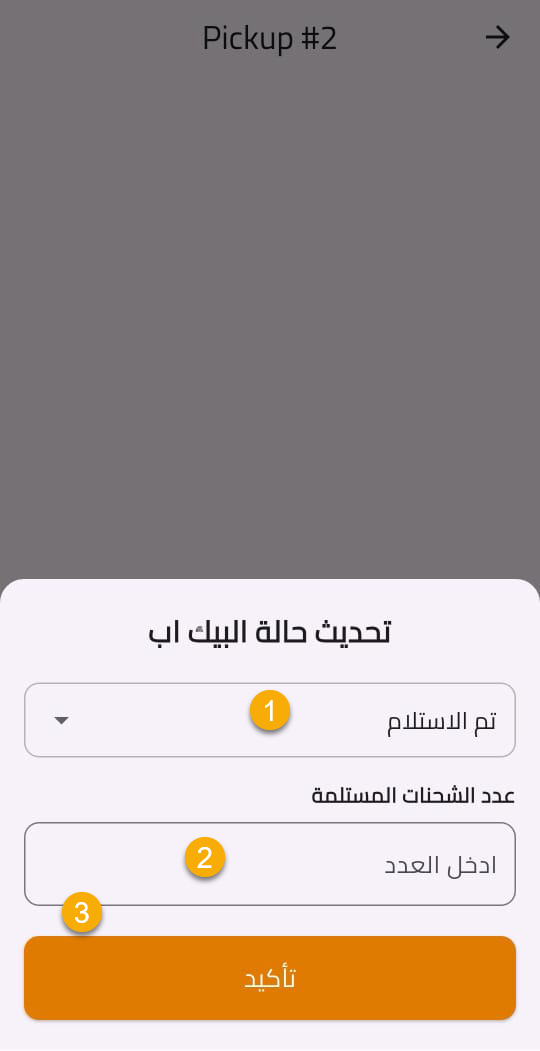
- The task moves automatically to Completed Tasks
🆕 Order Preview
Ensures the product is not changed during delivery.
How to Use:
- Scan the shipment QR Code.
- A 5-minute timer starts.
- Re-scan the QR Code after the timer ends.
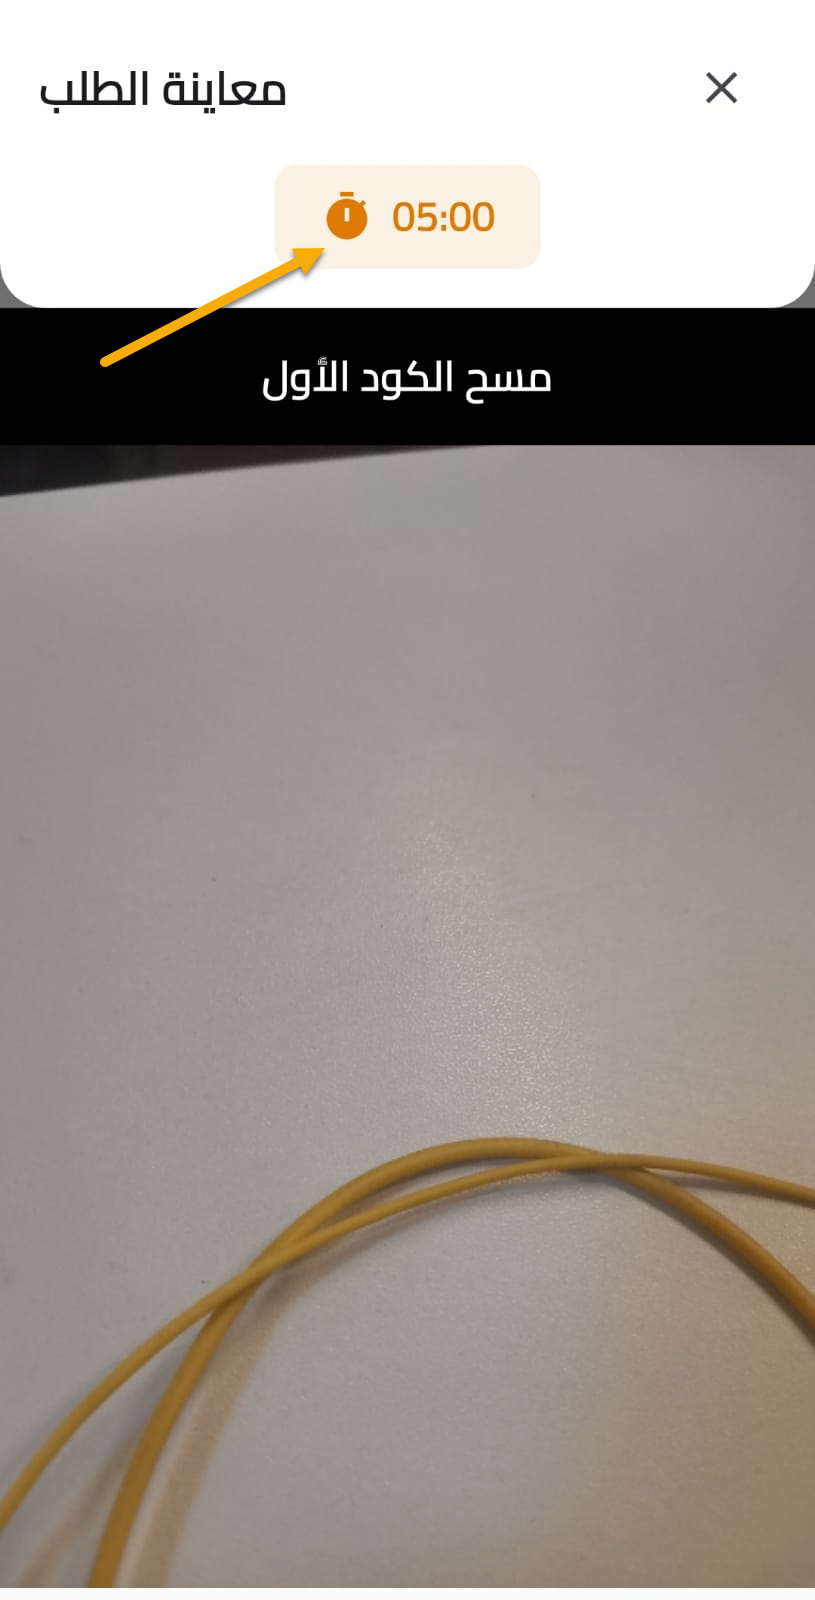
This ensures no product tampering during inspection.
🆕 Delivery Types & Validations
Different delivery scenarios based on shipment configuration:
1. Standard Delivery:
- Direct delivery confirmation.
2. Delivery with POD:
- Requires uploading a Proof of Delivery image.
3. Delivery with ID:
- Requires entering the customer’s ID number.
- Stored and visible in detailed tracking.
4. Delivery with OTP:
- Requires entering the OTP sent to the customer.
- Delivery cannot be completed without correct OTP.